Modern Living Room Design: The Before and After
- Lola

- Oct 8, 2020
- 3 min read
Updated: Feb 12, 2021
Thinking about updating a room? For many people, this means moving furniture around and buying new pieces, and that sounds like a big hassle.
The good news is that there are some great digital ways to do it that can save you time and resources, such as rendering.
If you are a visual person like myself, there is no better way to communicate an idea than visualizing it in an image. Rendering is the best instrument an interior designer has to show a design coming to life in an image.
In this post, I'm sharing with you the steps into the virtual design process.

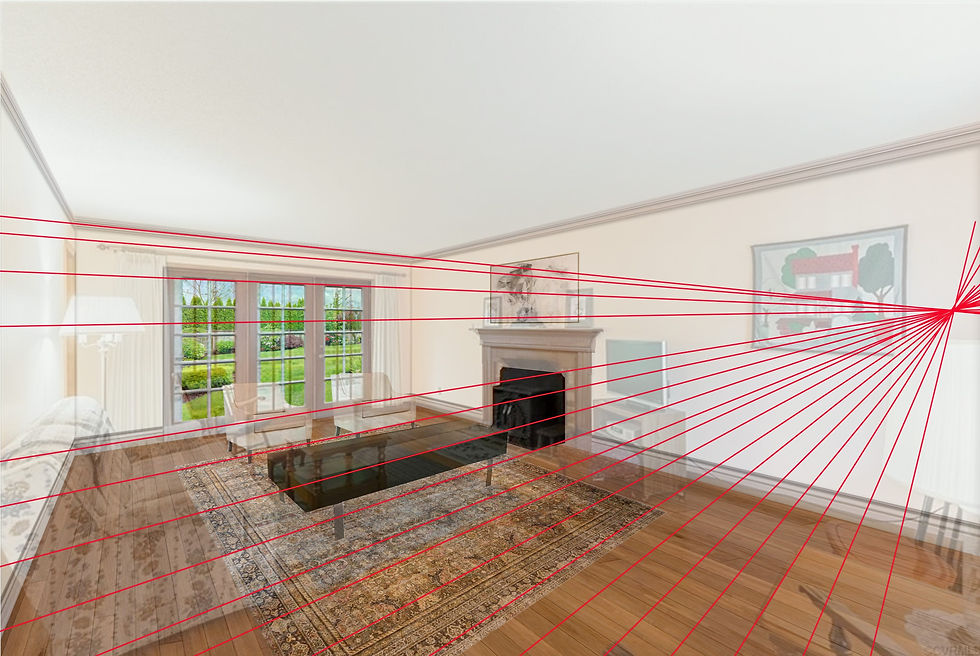
The 'before' picture
Having a picture of the room you want to design will make things much easier. Even if you don't have the exact measurements of the room, a picture will help with the size of the furniture you will be adding in place. Also, you can grab the actual architectural details of the room from it.
The client needs
The client requirements are the foundations for the new design. The more specific, the better.
The importance of understanding the client, getting to know their needs, will make the design easier and accurate.
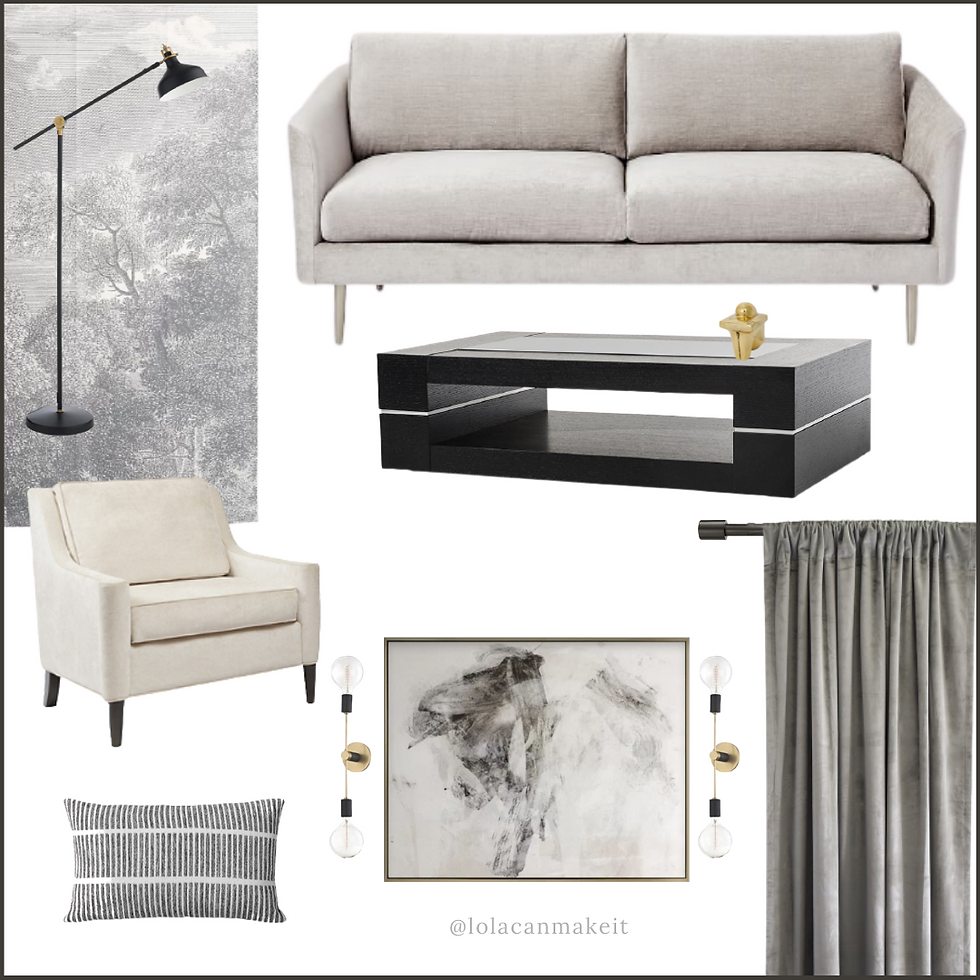
At this step, you can use some pictures of "inspiration" that could be helpful for both parts. Below is the list of needs for this project and the inspirational pictures:
Contemporary look
Neutral color scheme
No need for a TV in this room


Designing a mood board
A design board or mood board is an arrangement of images that creates a visual presentation to approach the client's needs. It is the very first design step involved in the process.
A board brings a sense of how the most important pieces will function together. You don't need to work yet with the actual pieces, you can pick other pictures with a similar look.
Clearing out the room
Note: I use Adobe Photoshop for all the renderings. it is the most flexible tool for manipulating images you can find.
It is time now to start working on the 3D rendering. With your 'before' picture as your base, the first thing to do is clearing out the whole room, leaving only the architectural elements the room is keeping.

Preparing the room
The next steps are adding molding (if necessary), painting the room with the actual colors, and adding the floors.
If using Photoshop, setting the walls as smart objects will allow you to design the wall without using any perspective. And then, placing the wall in perspective, with everything that has on it.

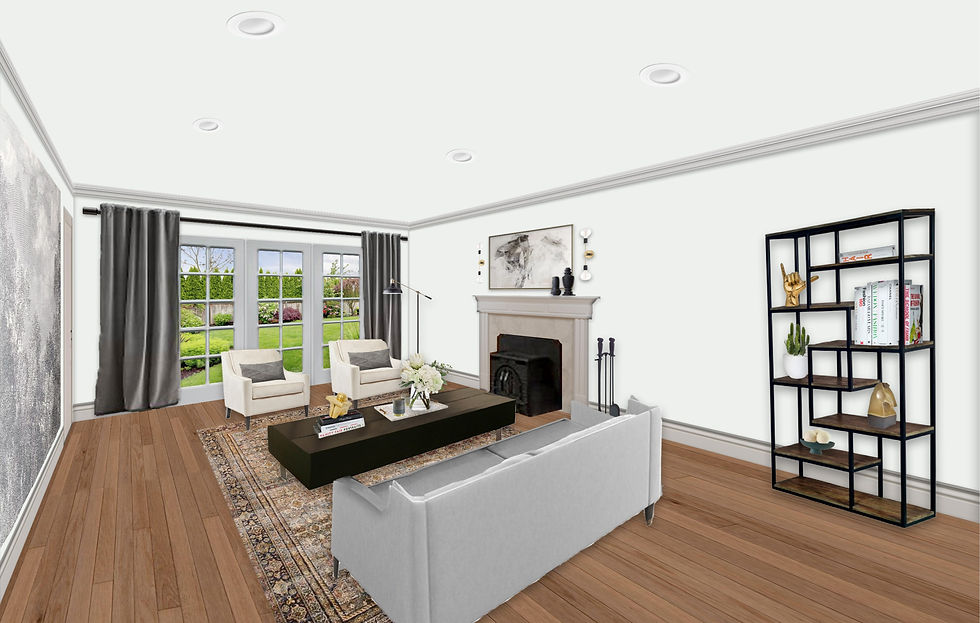
Adding the furniture in perspective
There you go! You have your exact room, but upgraded as the client wants it, and all empty.
Blank sheet syndrome? No worries, you have the mood board.
A quick insight into Interior Design: when designing a room you need to consider two sides. One is your client's needs, the other one is the room's layout.
The room's layout will determine how to bring in most of your client's needs.
Drawing perspective lines, using wall limits and the old furniture placing, are essential for adding the new furniture in perspective.
Finalizing the 3D rendering
In this project, the new focal point is the triple french door that leads to the backyard. Also, the fireplace has been dressed up, carrying your eye up to the ceiling. On the opposite wall, a tapestry makes the room feels balanced.
If you would like to go deeper into this topic, check out my article How to give a room a designer feel.
Final thoughts
The outcome of these four steps are a design board and a 3D rendering. These are the 'deliverables' for the client.
E-design is a great opportunity to work virtually with anyone in the world since all the collaboration can be made online!
Not sure how to complete a rendering or which would be the best layout for your room?
Get in touch! I'd love to hear from you.


Comments